A few months ago, I posted up an image of my first paper cutting. Do you remember? To tell the truth, I wasn't even sure if I had posted it or not and even had to glance back at my history to see if it was there. But it is and you can read all about it here or just admire the pretty picture of it below!

Well since then, I've now created another paper cut that I made specifically for my grandparent's 50th wedding anniversary. After racking my brains for something special to make them, I decided on the idea of a paper cut as I just love the simple but intricate work you can put into it creating something hopefully quite special.
After drawing out the design and tracing aspects into it here and there, I was ready to start cutting. I really must make more of these cuttings. I'd forgotten even in just a few months how much I enjoyed doing them.
But enough rambling, let me show you some photos. Cue the jingling art gallery music. (I should find away of inserting that into a blog! On second thoughts, maybe not. That jingle can get quite annoying after a while. Never mind, just hum it in your head if you want.)


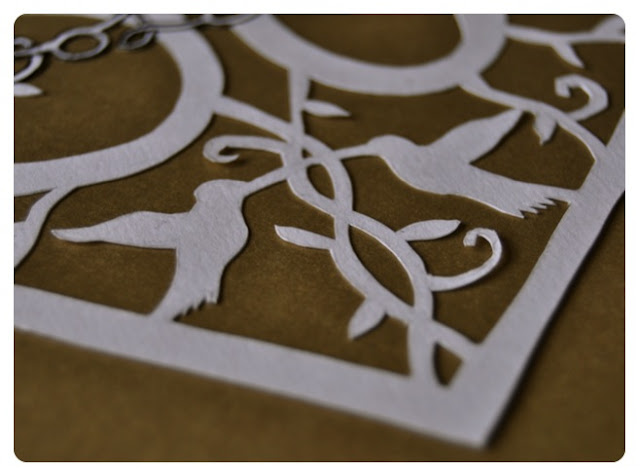

Obviously all cut out of the same paper, the word 'golden' was a bit hard to see once it was all finished due to a lot of it being on top of the 50. The decision to outline the word in black was a bit of a scary one because if it didn't look right, I would have ruined the whole of the paper cut! Thankfully though, I took the gamble as I knew otherwise the word would be unreadable and it paid off.
For the frame, I went rummaging in a big charity shop that resembles more of a warehouse and found this brightly coloured piece. I thought that the contrast of red with the golden paper would look quite nice and classy. Not only that but it would coincide with my sister's present to them too. She's creating a lovely quilted bed runner in these colours with a twist in that a lot of the patches have writing on them from the guests at the party.

Here you can see them receiving the present. They'd better like it I thought, as there was a whole room of people watching this!
Thankfully though I think they were over the moon with what I had created for them. I love making special presents for people who have no clue of what it might be. The excitement at seeing their reaction was definitely worth the blister that had begun to form on my thumb from holding the craft knife by a long way!

50 Years! Wowee! Congratulations Nana and Grandad.


